
Introduction
Let’s be honest—keeping a house clean is a never-ending battle. It feels like as soon as you finish sweeping, a fresh layer of dust magically appears on the coffee table. This is exactly why the vacuum cleaner is probably the most overworked appliance in our homes. It’s a lifesaver, but many of us treat it like a “set it and forget it” tool. We buy it, plug it in, and expect it to work perfectly forever.
Then, six months later, we notice it’s making a high-pitched whistling sound, or worse, it’s just pushing the dirt around instead of picking it up. Most people think the machine is broken, but more often than not, it just needs a little TLC.
Using a vacuum properly isn’t just about pushing it back and forth. It’s about understanding how it breathes and how to keep it “healthy.” In this guide, I’ll walk you through everything from the first assembly to the deep cleaning habits that will make your vacuum last for years.
Putting It All Together: The Assembly
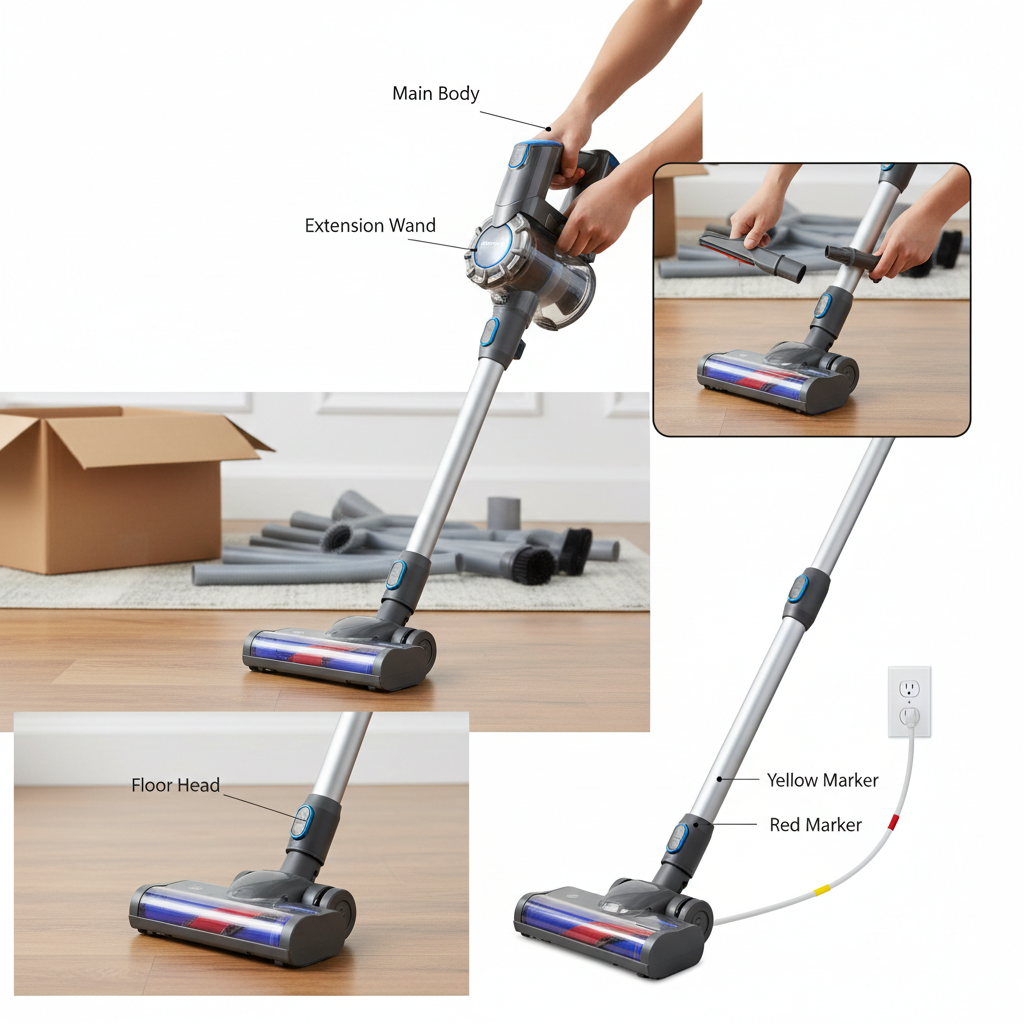
If you’ve just unboxed a new vacuum, you might be looking at a pile of plastic tubes and brushes and feeling a bit overwhelmed. Don’t worry; most modern vacuums are designed to snap together like building blocks.
Cord Safety: Before you plug it in, pull the cord out all the way. Many vacuums have a yellow mark (warning you’re near the end) and a red mark (stop pulling!). Avoid tugging on the cord once it’s plugged in, as this can damage the internal wiring.
The Main Connection: First, find the main body and the long hose. Most hoses have a “click-lock” mechanism. Push it in until you hear that satisfying click. If you have to force it, something is probably misaligned.
Choosing Your Head: Most vacuums come with a floor head (the big one) and several smaller attachments. For hard floors or carpets, snap on the main floor head. If you have an upright vacuum, this is usually already attached.
The Extension Wand: If you’re cleaning ceilings or under low furniture, add the extension wand. It’s better to set this up now rather than stopping halfway through your cleaning session.
How to Actually Use Your Vacuum (The Right Way)
You might think, “I know how to vacuum, I’ve been doing it for years!” But there’s actually a bit of a technique to it that can save you a lot of time and effort.
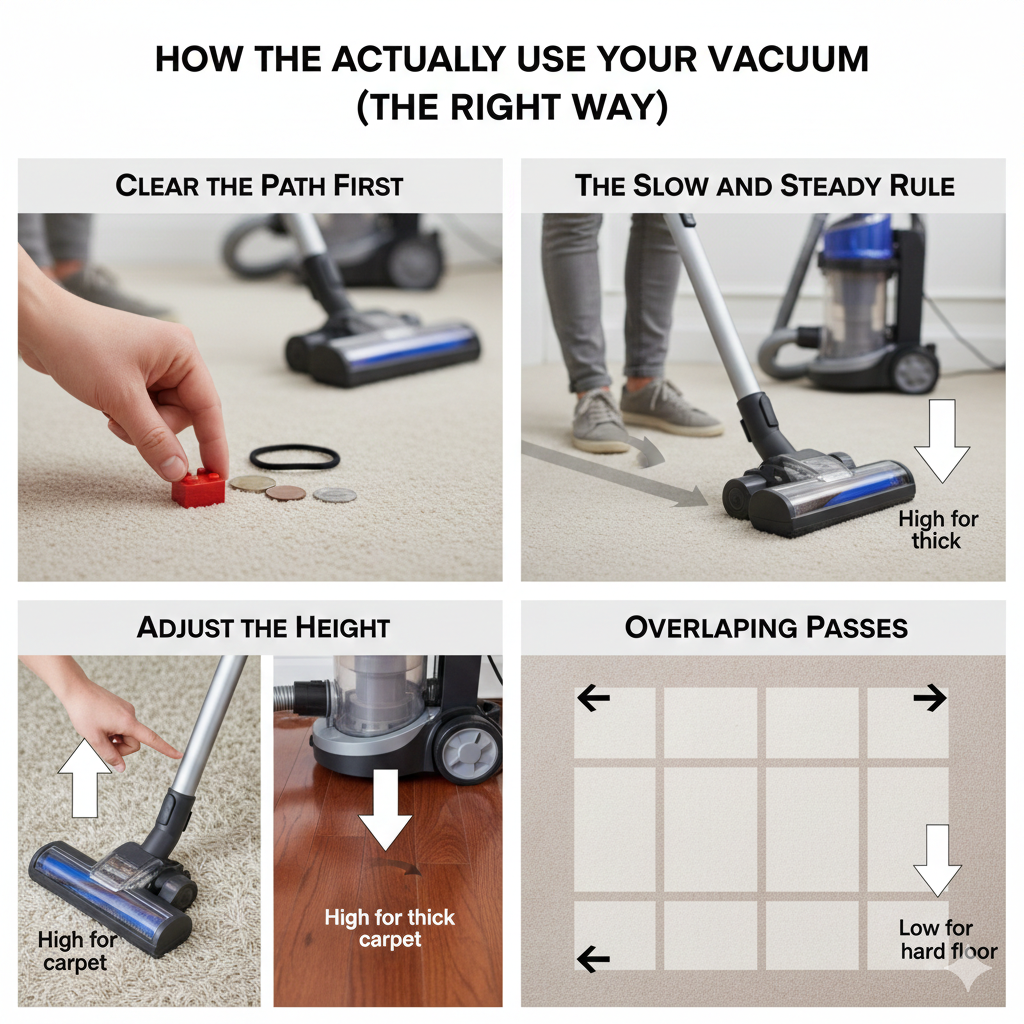
Overlapping Passes: Think of it like mowing a lawn. Overlap your rows slightly so you don’t leave “dust strips” behind.
Clear the Path First: This is the most important rule. Before you turn the machine on, do a quick “sweep” with your eyes. Pick up coins, hair ties, LEGOs, or large scraps of paper. These are “vacuum killers.” They get stuck in the hose or jam the motor, leading to expensive repairs.
The Slow and Steady Rule: Most people vacuum way too fast. If you zip across the carpet, the brush roll doesn’t have enough time to vibrate the dirt out of the fibers. Go slow. Push forward, then pull back slowly. It’s the pull-back motion that usually does the most cleaning.
Adjust the Height: If your vacuum has a height adjustment dial, use it! For hard floors, keep it low. For thick, shag carpets, raise it up. If it’s too low on a thick carpet, you’ll notice it’s incredibly hard to push—that’s the motor struggling to breathe.
Making the Most of the Hose and Attachments
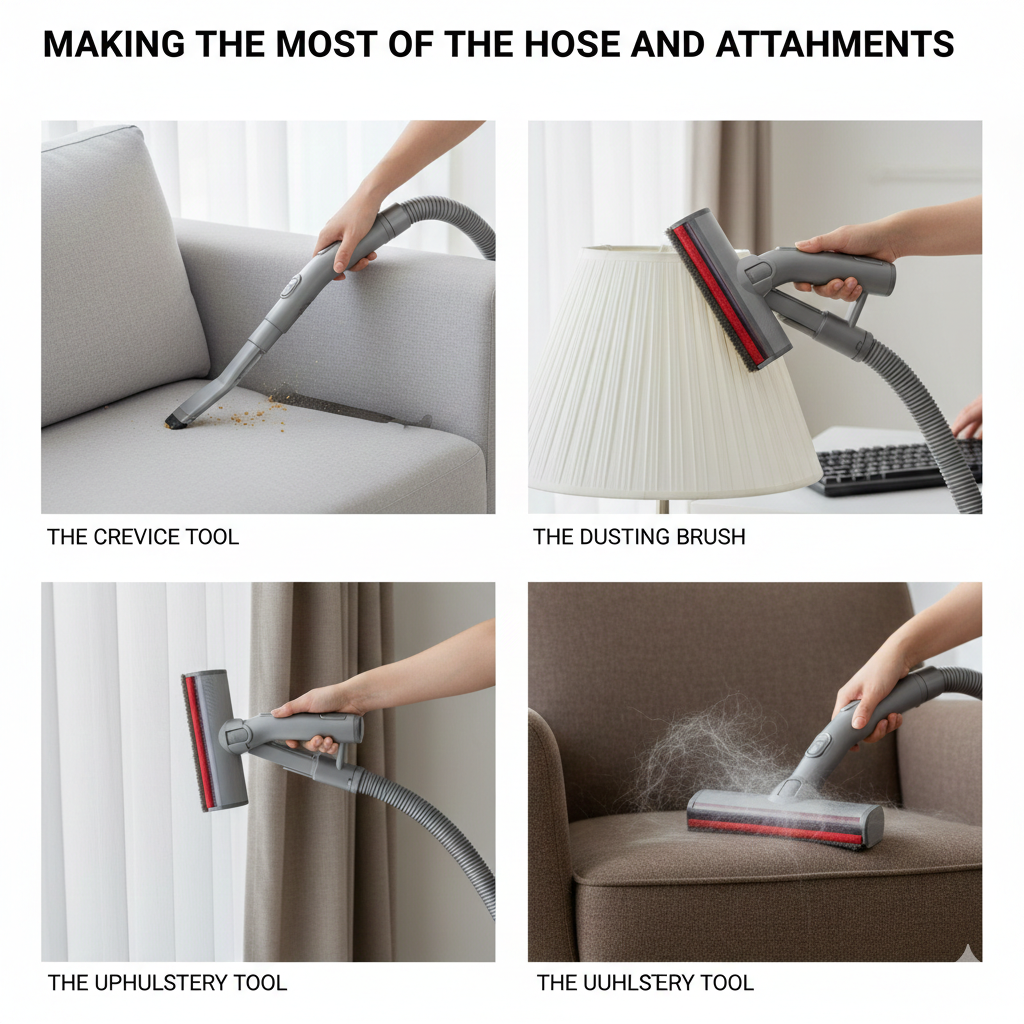
That long, flexible hose isn’t just for reaching the corners of the floor. Your vacuum usually comes with a “toolkit” that most people leave in the closet. Here’s how to use them:
- The Crevice Tool: This is the long, skinny, flat one. It’s perfect for the “crumb graveyard” in your sofa cushions, the tracks of your sliding windows, and the edges of the baseboards.
- The Dusting Brush: This has soft bristles. Use it for your lampshades, blinds, and even your keyboard. It’s much more effective than a duster because it sucks the dust away instead of just moving it into the air.
- The Upholstery Tool: Usually a small, wide head with a fabric strip. This is great for mattresses and curtains. If you have pets, this is your best friend for getting fur off the chairs.
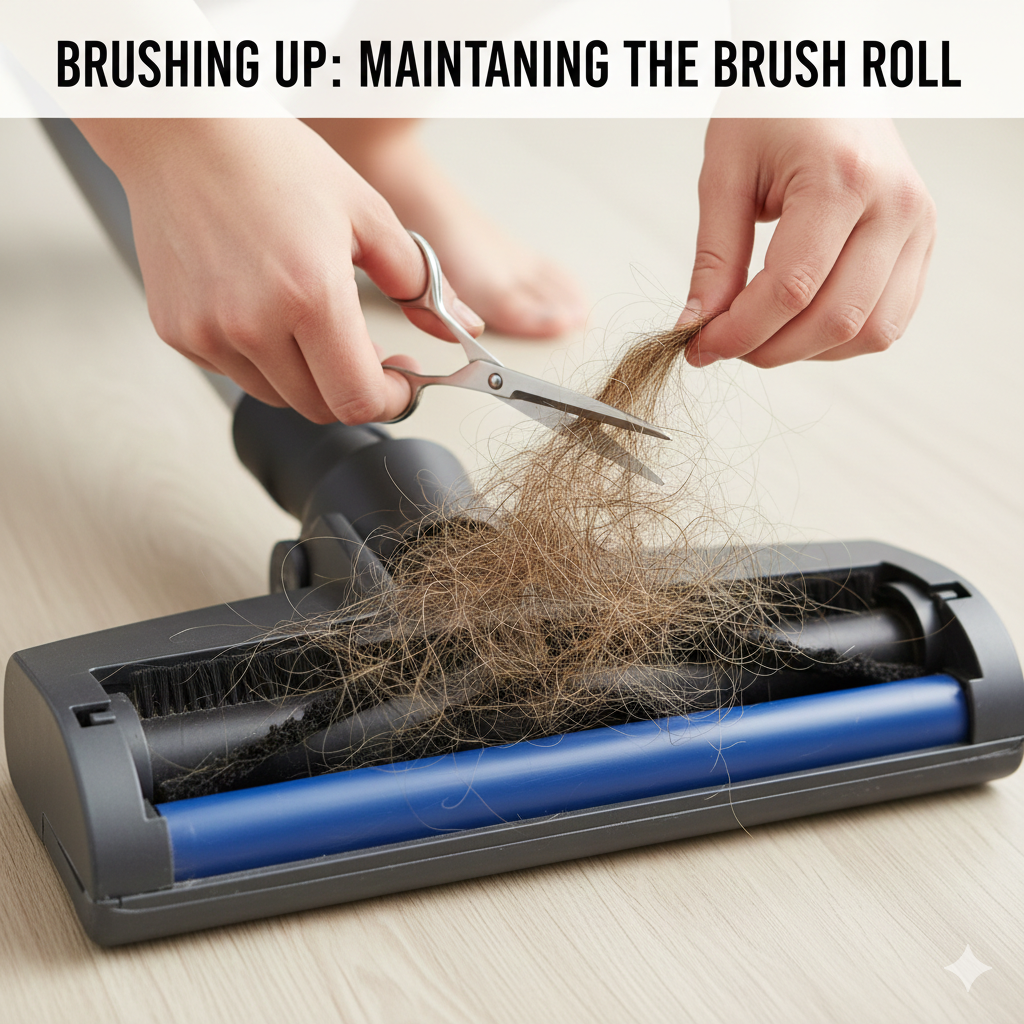
Brushing Up: Maintaining the Brush Roll
Turn your vacuum over (make sure it’s unplugged!). See that rotating bar with bristles? That’s the brush roll, or “beater bar.” Over time, it becomes a magnet for hair, thread, and carpet fibers.
If the brush roll is wrapped in hair, it can’t “flick” the dirt into the vacuum. Even worse, the friction can melt the plastic bearings or snap the drive belt.
The Fix: Every month or so, take a pair of scissors and carefully snip the hair and strings wrapped around the brush. Be careful not to cut the bristles themselves. Once you’ve snipped them, you can usually just pull the hair away by hand. It’s a bit gross, but your vacuum will perform like new afterward.
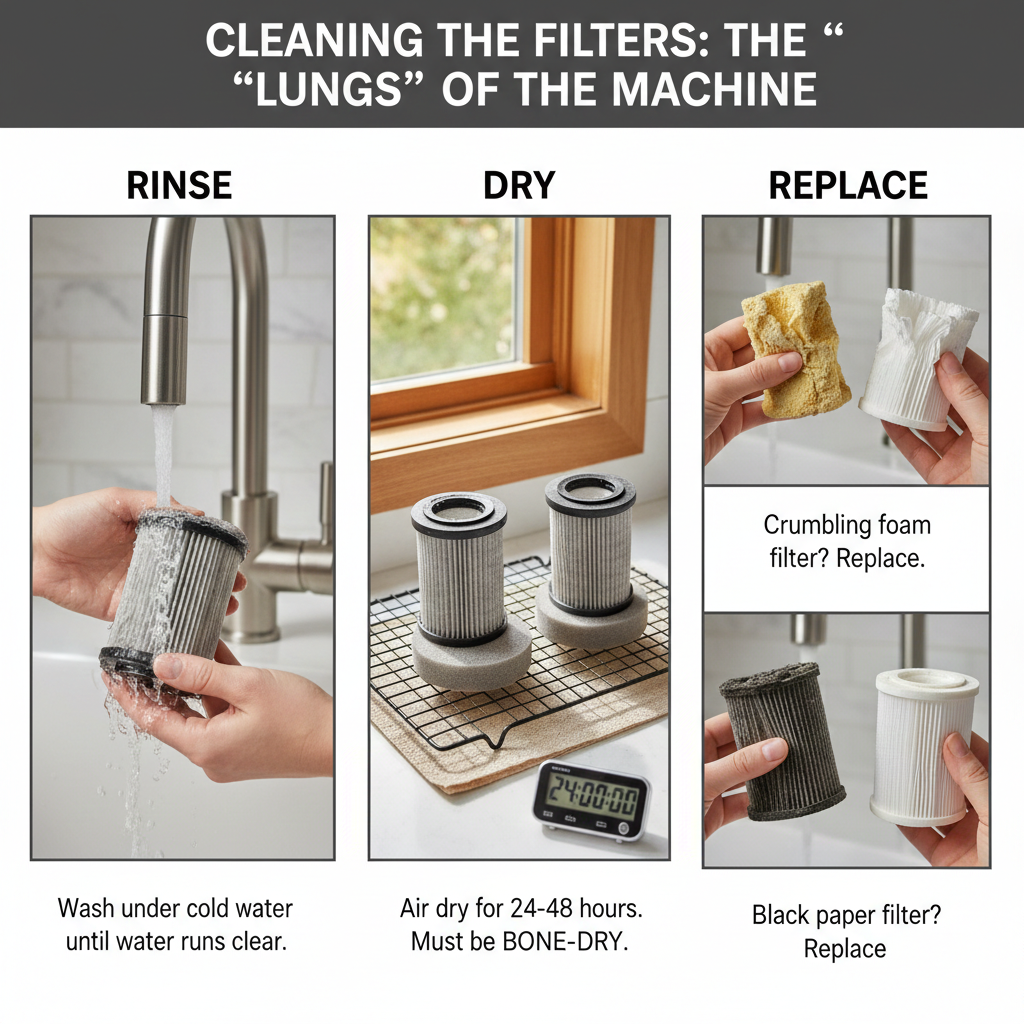
Cleaning the Filters: The “Lungs” of the Machine
This is where most people go wrong. A vacuum works by pulling air in and pushing it out. If the filters are clogged, the air can’t move. This makes the motor run hot, and eventually, it will just burn out.
- When to Clean: Check your filters every month. If they look grey or caked with dust, it’s time.
- Washable vs. Replaceable: Check your manual. Most modern vacuums have HEPA filters that are “washable.” Rinse them under cold water until the water runs clear. Don’t use soap unless the manual says it’s okay.
- The Golden Rule of Filters: Never, ever put a damp filter back into a vacuum. It will grow mold and smell terrible, and the moisture can kill the motor. Let the filter air dry for at least 24 to 48 hours until it’s bone-dry.
- Replacement: If you have a foam filter that is starting to crumble or a paper filter that is black, just buy a new one. They are usually quite cheap and make a world of difference.
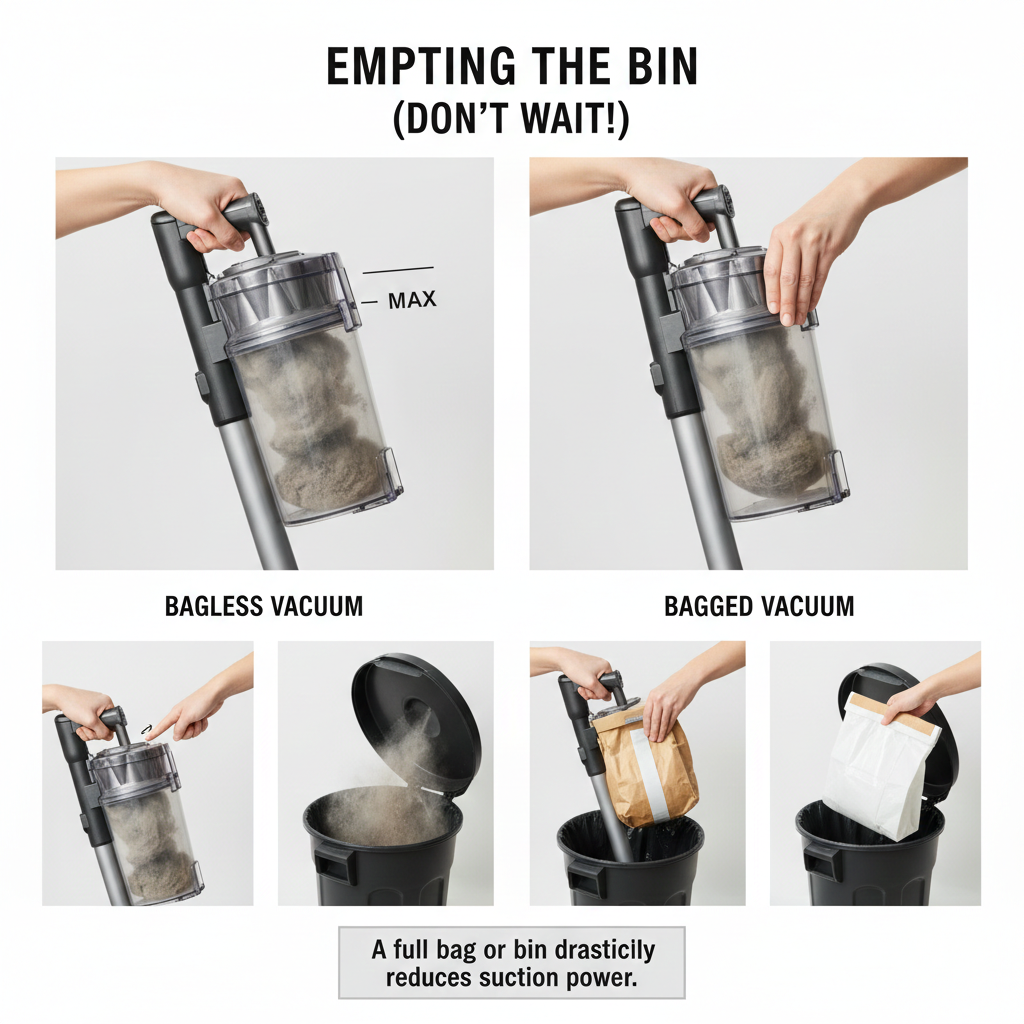
Emptying the Bin (Don’t Wait!)
If your vacuum has a clear plastic bin, don’t wait until it’s packed tight to empty it. Most manufacturers recommend emptying it once it hits the “Max” line, which is usually around 70% full.
If you have a bagged vacuum, change the bag when it feels firm to the touch. A full bag or bin drastically reduces “suction power.” It’s like trying to breathe through a straw that’s stuffed with cotton—it’s just not going to work well.
General Care and Troubleshooting
A little bit of observation goes a long way.
- Listen to the Sound: If your vacuum suddenly changes pitch (starts whining or sounding muffled), stop immediately. This usually means something is stuck in the hose. You can usually clear a clog by dropping a coin or a heavy marble through the hose to push the obstruction out.
- Smell Check: If it smells like burning rubber, your belt might be slipping or the brush roll is jammed. Turn it off and check for obstructions.
- Cord Care: When you’re done, don’t just let the cord “snap” back in if you have an automatic rewinder. Hold the cord and guide it in slowly so it doesn’t whip around and break the plug or hit your furniture.

A Final Thought
At the end of the day, a vacuum cleaner is a simple machine that does a hard job. It’s constantly inhaling the stuff we want to get rid of, so it’s only fair that we give it a quick “bath” and a check-up every now and then.
If you spend just ten minutes a month snipping away hair from the brush and rinsing out the filter, you won’t just have a cleaner house—you’ll save yourself the several hundred dollars it costs to buy a new machine every couple of years. Treat your vacuum well, and it’ll keep those floors walk-on-them-barefoot clean for a long, long time. Happy cleaning!