


Introduction:
We’ve all been there—you’re in the middle of a weekend cleaning spree, pushing your vacuum back and forth over the same spot, only to realize that the piece of lint you’re targeting isn’t moving. In fact, it’s just being pushed around. It’s frustrating, right? We usually just assume the vacuum is getting old or that it was a “cheap” model to begin with.
But here’s the honest truth: a vacuum cleaner is one of the hardest-working machines in your home. It literally “eats” the stuff we want to get rid of—dust, hair, crumbs, and microscopic allergens. Because it’s constantly inhaling debris, it needs more than just an occasional empty of the dust bin.
The big question is: When do you just give it a quick wipe, when do you need to buy a new part, and when is it time to throw in the towel and buy a new machine? Let’s break it down into simple, manageable steps so you can keep your home clean without losing your mind (or your budget).
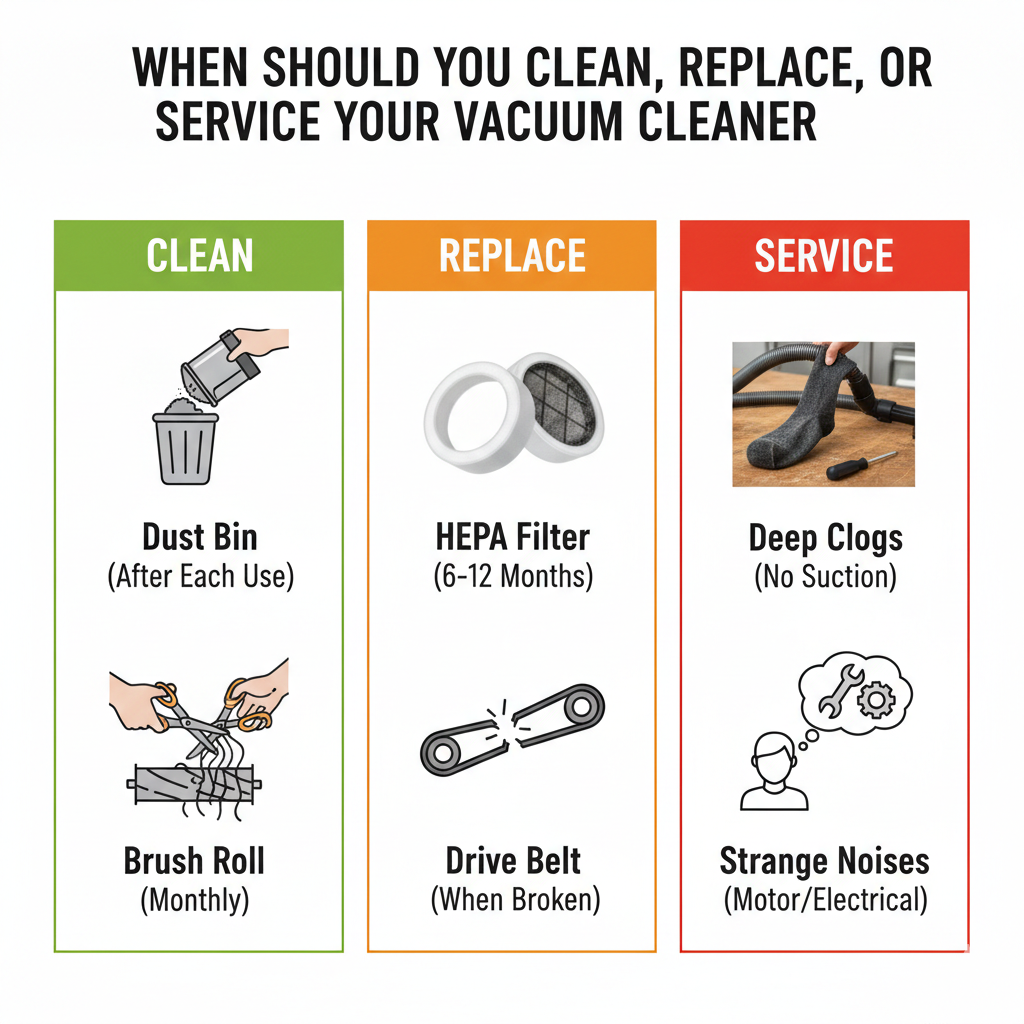
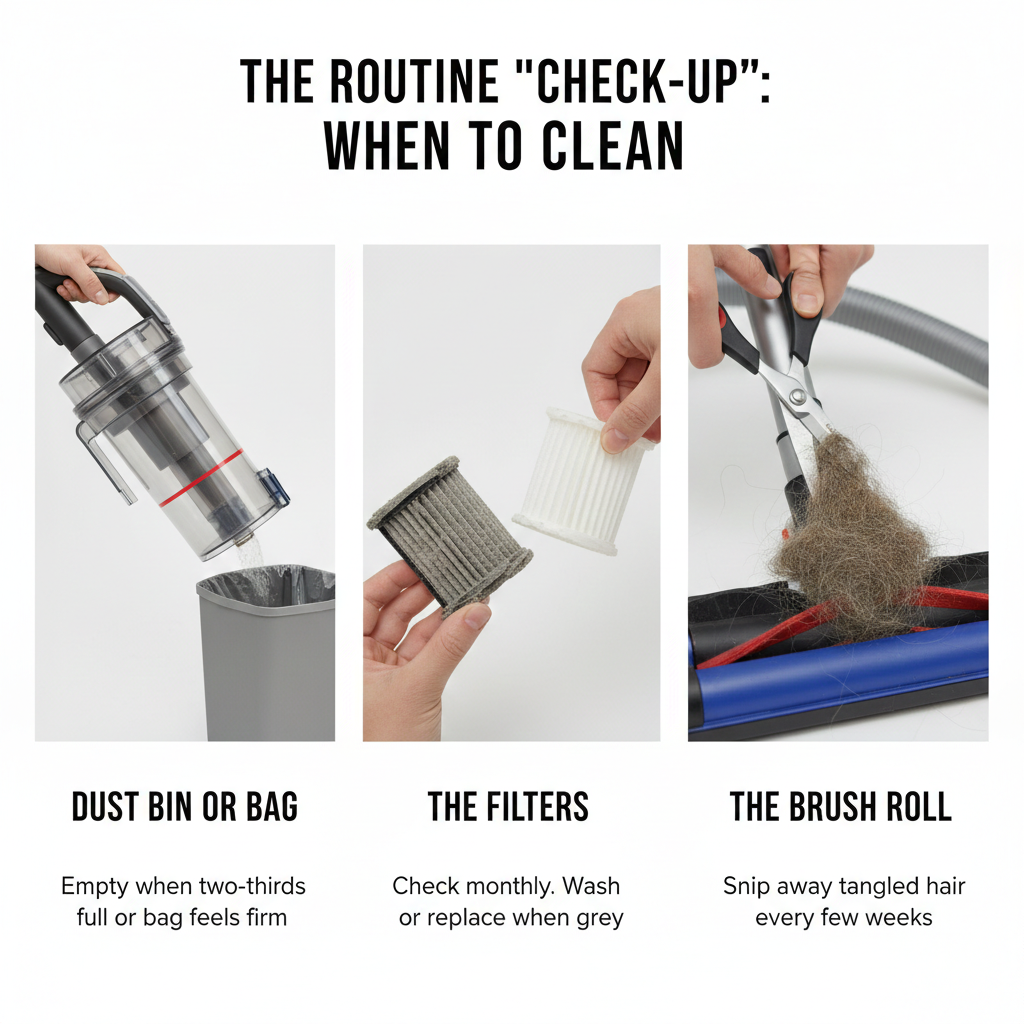
The Routine “Check-Up”: When to Clean
Cleaning your vacuum isn’t just about making it look nice; it’s about airflow. If air can’t move through the machine freely, it can’t pick up dirt. It’s that simple.
- The Dust Bin or Bag: You shouldn’t wait until the bin is packed to the brim. For bagless models, try to empty it when it’s about two-thirds full. For bagged models, change the bag when it feels firm or “puffy.” If it’s too full, the motor has to work twice as hard, which leads to overheating.
- The Filters: This is the part most people forget. Most modern vacuums have at least one or two filters. If they look grey or caked with fine dust, they need a wash (if they’re washable) or a good tapping out. A quick rule of thumb? Check them once a month.
- The Brush Roll (Beater Bar): Take a look at the bottom of your vacuum. If you see a thick “sweater” of hair and thread wrapped around the rotating brush, your vacuum isn’t actually cleaning your carpet; it’s just buffing it. Grab a pair of scissors and carefully snip those hairs away every few weeks. You’ll notice an immediate difference in how the vacuum “pulls” itself across the floor.
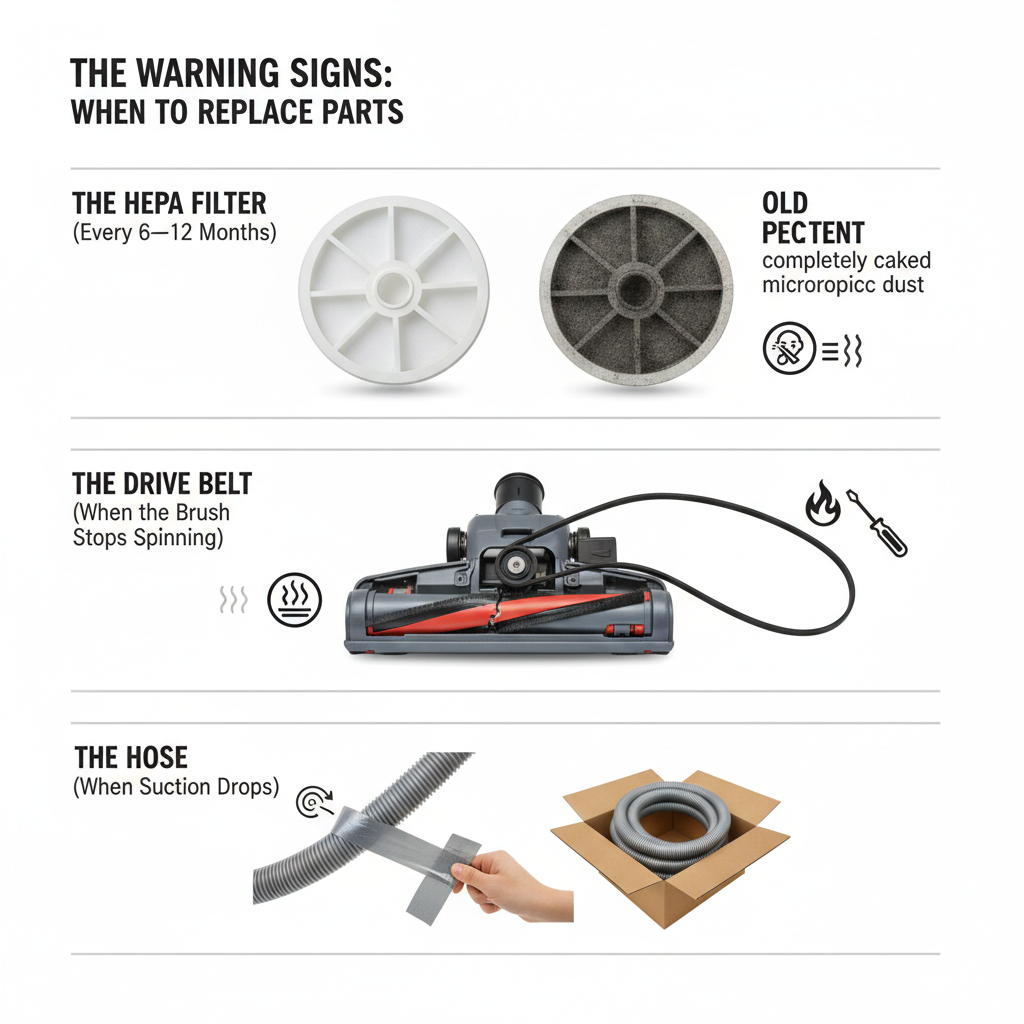
The Warning Signs: When to Replace Parts
Sometimes, cleaning isn’t enough. Like tires on a car, certain parts of a vacuum are designed to wear out over time. Here is when you should look into buying replacements:
- The HEPA Filter (Every 6–12 Months): Even if you wash your filters, they eventually get “clogged” at a microscopic level. If you notice a dusty smell while vacuuming, or if someone in your house is sneezing more than usual, it’s time for a fresh filter.
- The Drive Belt (When the Brush Stops Spinning): If you hear the motor running but the brush at the bottom isn’t turning, the belt has likely snapped or stretched out. You’ll often smell a “burning rubber” scent when this happens. Belts are usually very cheap (a few dollars) and can be replaced at home with a screwdriver.
- The Hose (When Suction Drops): If you feel great suction at the base of the machine but nothing at the end of the hose, check for cracks. Even a tiny pinprick hole in the plastic hose can ruin the vacuum’s performance. You can sometimes patch these with duct tape, but a replacement hose is a better long-term fix.
Professional Help: When to Service Your Vacuum
You don’t always need to be a DIY expert. Some things are better left to a local vacuum repair shop (yes, they still exist, and they are great!).
- Deep Blockages: If you’ve sucked up a sock or a large chunk of something and it’s stuck deep inside the internal plumbing where you can’t reach it, a pro can take the machine apart and clear it without breaking the plastic housing.
- Strange Noises: If your vacuum starts making a high-pitched “screaming” sound or a heavy grinding noise, a bearing might be shot. A repair shop can often grease or replace these parts for a fraction of the cost of a new vacuum.
- Electrical Issues: If the cord is frayed, or if the vacuum keeps cutting out during use, don’t mess with it yourself. Electrical repairs should always be handled by someone who knows what they’re doing to avoid fire hazards.
The “Deal Breaker”: When to Replace the Whole Machine
I’m a big fan of fixing things rather than throwing them away, but sometimes, it’s just not worth it. Here is how to know when your vacuum has reached the end of the road:
- The “50% Rule”: If the cost of the repair (parts + labor) is more than 50% of what a new, equivalent vacuum costs, it’s time to move on.
- Burning Motor Smell: If you smell an “electrical” burn (different from the rubber smell of a belt) and the machine feels incredibly hot, the motor might be failing. Replacing a motor is usually the most expensive repair, and often indicates the machine is worn out.
- The Age Factor: Most mid-range vacuums are built to last about 5 to 8 years. If yours is 10 years old and starting to act up, the plastic components are likely becoming brittle, and finding replacement parts will get harder.
- Technology Passes You By: If you have an old vacuum that doesn’t have a HEPA filter and you struggle with allergies, upgrading to a modern sealed-system vacuum might be worth it just for the health benefits.
Simple Tips to Make Your Vacuum Last Longer
If you want to avoid the “Replace” stage for as long as possible, try these three simple habits:
- Don’t “Vacuum” the Cord: It’s tempting to just run over the power cord, but the spinning brush can nick the insulation, leading to dangerous wires being exposed.
- Dry Floors Only: Unless you have a specific “Wet/Dry” vacuum (like a Shop-Vac), never vacuum up damp spills. Moisture gets into the motor and the filters, causing mud to form inside the machine and eventually leading to rust or mold.
- Check for Clogs Promptly: If the vacuum sounds different, stop and check the hose. Running a vacuum with a clog is like running a marathon while holding your breath—it’s going to end badly for the motor.
Summary
Maintaining a vacuum isn’t about being a “neat freak”—it’s about being practical. A well-maintained $150 vacuum will almost always outperform a $500 vacuum that has a clogged filter and a hair-wrapped brush roll.
Take ten minutes this weekend to give your vacuum a little “spa day.” Clean the bin, snip the hair off the brush, and check the filters. You’ll be surprised at how much better it works, and your carpets (and your wallet) will definitely thank you.
Cleaning doesn’t have to be a chore if your tools are actually working the way they should. Keep that airflow moving, and your vacuum will be your best friend for years to come!