



You vacuum your home to keep it clean, but when was the last time you cleaned the vacuum itself? Over months of use, dust cakes the inside of the bin, hair wraps around the brush roll, filters clog with fine particles, and the hose collects hidden debris. The result is weak suction, a stale smell and a machine that seems to push dirt around instead of picking it up.
The good news is that a proper deep clean can bring most vacuums back to life. It takes about an hour of hands-on time, needs only basic household items, and often costs nothing at all. Many people who think they need a new vacuum simply need a thorough clean and a fresh filter.
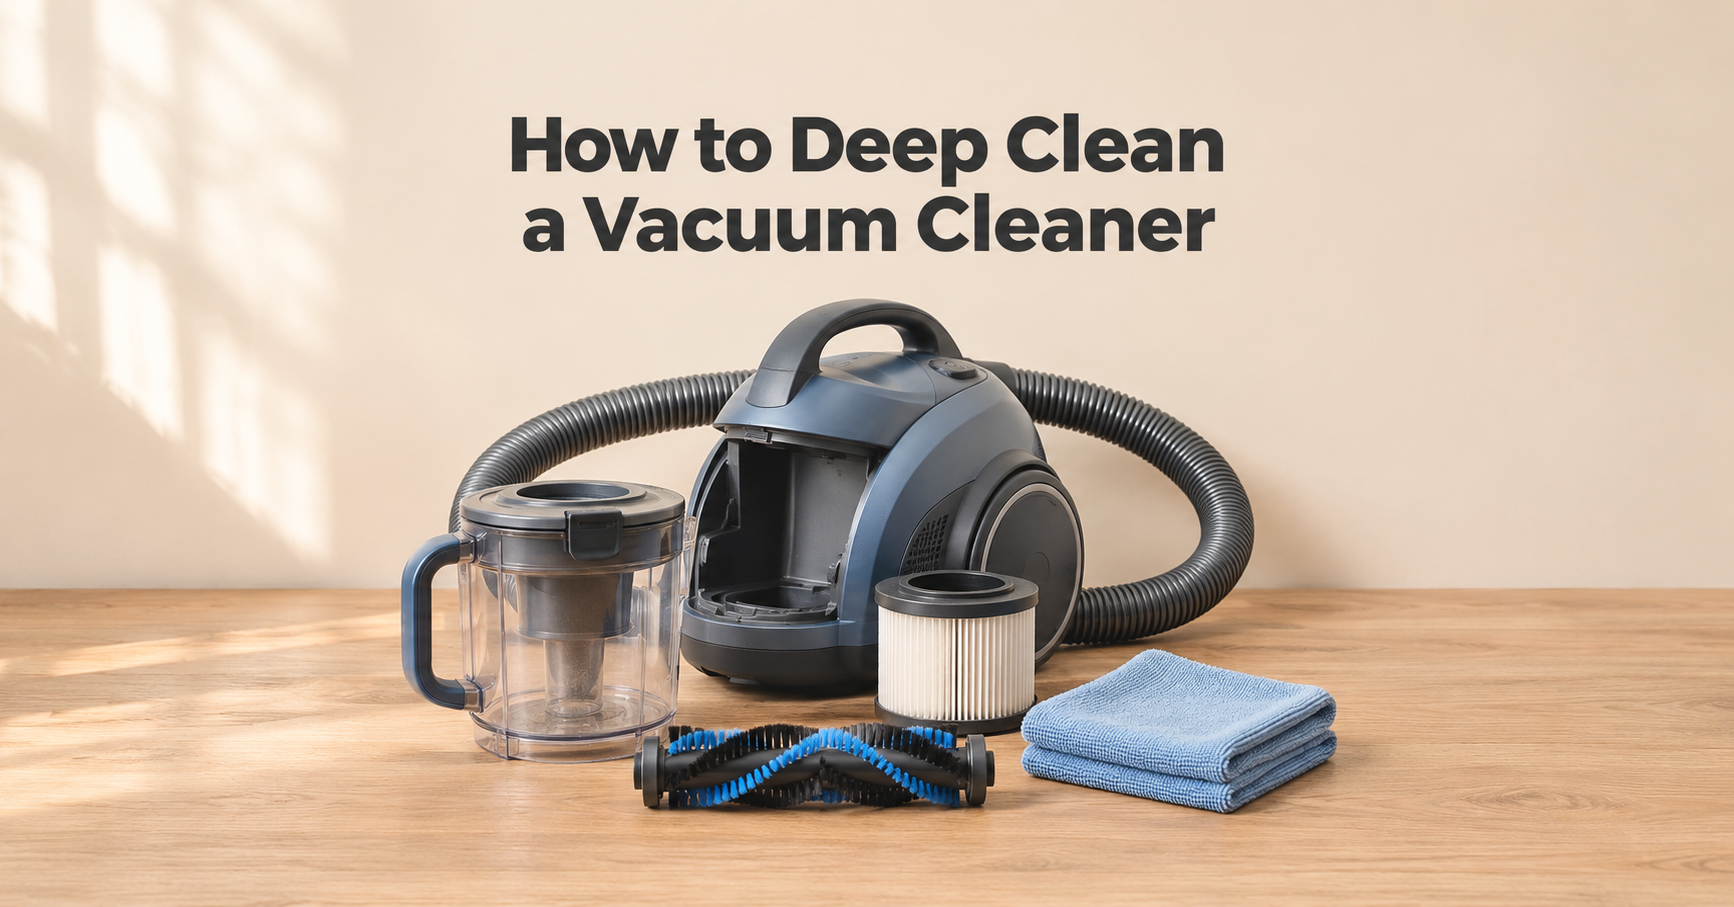
This guide shows you exactly how to deep clean a vacuum cleaner step by step. You will learn what to wash and what to keep dry, how to clean each part safely, how to remove bad smells, how often to repeat the job, and how to adjust the process for upright, canister, cordless and robot vacuums.
Quick answer: To deep clean a vacuum cleaner, unplug it, empty and wash the dust bin, clean or replace the filters (and dry them for 24 hours), cut hair from the brush roll, clear the hose and wand, wipe the floor head and wheels, wipe the body and attachments, then reassemble only when every part is completely dry. Repeat every three to six months, or more often if you have pets.
In this guide:
- Signs your vacuum needs a deep clean
- Tools and supplies you need
- Safety rules before you start
- The 8-step deep cleaning process
- What you can wash and what must stay dry
- How long the job takes
- How to remove vacuum odors
- Tips for each vacuum type
- Troubleshooting, mistakes and frequently asked questions
Signs Your Vacuum Needs a Deep Clean
A quick empty after each use is not enough to keep a vacuum in top condition. Dust builds up in places you cannot see, and the performance drops slowly, so you may not notice until it is quite bad. Look for these signs:
- Weak suction: the vacuum leaves crumbs, hair or dust behind even on slow passes.
- A musty or burning smell: old dust, damp filters and pet hair create odors, and a slipping belt can smell like hot rubber.
- Dust blowing back out: a clogged filter or a poorly seated bin can leak fine dust into the air.
- A brush roll that is slow or stuck: hair and thread are wrapped tightly around it.
- The vacuum shuts off unexpectedly: restricted airflow can cause the motor to overheat and the thermal cut-off to trip.
- Visible dirt: a greasy bin, dusty vents, or grey, stiff filters are clear signals.
- Louder than usual: a whistling or rattling sound often points to a blockage or trapped debris.
What You Need to Deep Clean a Vacuum
You probably already own everything required. Gather these items before you begin:
- Scissors or a seam ripper for hair on the brush roll
- A soft brush, such as an old, clean paintbrush or toothbrush
- Microfiber cloths (one damp, one dry)
- Mild dish soap and a bowl or sink of cool to lukewarm water
- A screwdriver or coin to open brush roll covers
- A broom handle or long, blunt tool to push through the hose
- Tweezers for small stones, thread and debris
- Rubber gloves and a dust mask, especially if you have allergies
- Newspaper, an old towel or a large trash bag to catch dust
- Replacement filters, belts and bags that match your model, in case parts are worn
- Your owner’s manual, so you can check which parts are washable
Do not use: bleach, strong solvents, hot water, a dishwasher (unless the manual allows it) or anything that soaks the motor, battery or electrical parts. These can damage plastic, warp filters and create a safety risk.
Safety Rules Before You Start
- Unplug the vacuum, or remove the battery on cordless and robot models, before touching any part.
- Work outdoors or on a covered surface, since you will release a lot of dust.
- Take a quick photo of the vacuum before you take it apart. It makes reassembly much easier.
- Check the manual for any parts marked “do not wash.”
- Never put electrical parts, the motor or the battery in water.
- Do not use the vacuum again until every washed part is fully dry.
The 8-Step Vacuum Deep Cleaning Process
Follow the steps in order. The roadmap below shows the whole job at a glance, and each step is explained in detail afterward.
Step 1: Unplug and Prepare Your Workspace
Switch off the vacuum and unplug it. Remove the battery if it is cordless. Move to a space where mess is no problem, such as a driveway, balcony or garage, and spread newspaper or a trash bag on the ground. Put on gloves and a mask, then take a photo of the vacuum so you know how everything fits together.
Step 2: Empty and Wash the Dust Bin or Replace the Bag
Bagless vacuums: Take off the bin and empty it into a trash bag, holding it close to the bag to limit the dust cloud. Tap the sides to knock out compacted dust, then pull out any hair that is stuck around the cyclone or mesh screen. If the manual says the bin is washable, rinse it in lukewarm water with a drop of mild dish soap, rinse again and dry it with a clean cloth. Leave it to air-dry completely, because moisture inside the bin leads to mold and odors.
Bagged vacuums: Remove the old bag and replace it, even if it is not full, when you are doing a deep clean. Then wipe out the empty bag compartment with a dry or very slightly damp cloth, and clean around the bag collar where dust gathers.
Step 3: Clean the Filters
Filters are the most important part of a deep clean, because a clogged filter is the number one cause of lost suction. Most vacuums have more than one filter: a foam or felt pre-motor filter, a HEPA filter and sometimes a post-motor (exhaust) filter. Check the manual to see which are washable.
- Tap out loose dust over a trash bag or outdoors.
- Rinse washable filters under cool running water, running water through from the clean side to the dirty side until it runs clear.
- Squeeze gently to remove water. Do not wring, twist or scrub, as this can tear the material.
- Air-dry for at least 24 hours in a warm, airy spot away from direct heat. A filter that feels even slightly damp can cause a musty smell or damage the motor.
- Replace non-washable filters that look grey, stiff or heavily stained. HEPA filters are usually replaced every 6 to 12 months, and a deep clean is a good time to do it.
Time-saver: Keep a spare set of washable filters. You can fit a dry one immediately and let the washed one dry in its own time.
Step 4: Free the Brush Roll and Check the Belt
Turn the floor head over and open the brush roll cover. Lift out the roll and cut away tangled hair and thread with scissors or a seam ripper, working along the length of the roll rather than across it. Pull the loose hair away and remove any strands wrapped around the end caps and bearings. Spin the roll by hand to be sure it moves freely.
Wipe the bristles with a damp cloth or brush them with a soft brush. If the manual allows, you can wash the roll in lukewarm soapy water, but it must be completely dry before it goes back in.
While the roll is out, check the belt (if there is one). Replace it if it is stretched, cracked or shiny and glazed. A worn belt slips, creating a burning rubber smell and poor carpet performance.
Step 5: Clear the Hose, Wand and Airways
Blockages hide in the hose and wand, and they are a common cause of weak suction. Detach the hose and wand and hold them up to a bright light to check for obstructions. Push a broom handle or long, blunt tool gently through the hose to dislodge stuck debris such as paper, socks, wrappers or compacted pet hair. You can also shake the hose while holding it vertically.
Wipe the outside with a damp cloth and check for cracks or splits, especially near the ends. Only rinse the inside of a hose if the manual says it is safe, and let it dry for at least a full day. Also look inside the passage where the hose connects to the vacuum body, since dust and hair can collect there.
Step 6: Clean the Floor Head and Wheels
With the brush roll out, wipe the inside of the floor head with a damp cloth and use a soft brush to loosen packed dust around the suction opening. Pick out stones, threads and debris with tweezers. Wipe the wheels and axles, and check that they turn freely. Look at the rubber seals and edges for cracks, which can reduce suction and scratch floors.
Step 7: Wipe the Body, Cord and Attachments
Use a slightly damp microfiber cloth with a little dish soap to wipe the vacuum body, handle and cord. Use a soft brush on vents and grilles, and keep liquid out of the vents. Dry everything with a clean cloth.
Rinse hard plastic attachments such as crevice tools, dusting brushes and upholstery nozzles in warm, soapy water, and use a soft brush on any bristles. Leave them to dry before storing. Inspect the cord and plug for damage while you are there.
Step 8: Dry Everything, Reassemble and Test
Wait until every washed part is completely dry, which usually means at least 24 hours for filters. Refit the filters, bin or bag, brush roll and cover, hose and wand. Use your earlier photo if you are unsure how something fits. Then plug in the vacuum and test it on a rug.
Check three things: strong, steady suction, a freely spinning brush roll (if the model has one), and no whistling or rattling noises. If something does not seem right, switch off and recheck the connections and seals.
What You Can Wash and What Must Stay Dry
Knowing which parts can handle water is the key to a safe deep clean. When in doubt, wipe with a damp cloth instead of rinsing, and always check the manual first.
How Long Does a Vacuum Deep Clean Take?
A full deep clean usually needs about 50 minutes of hands-on time, plus 24 hours of drying time for washed filters. The chart below shows where the time goes. If you split the job into two sessions (washing on day one and reassembling on day two), it feels much easier.
Quick Reference: Part, Method and Frequency
| Part | Best cleaning method | How often |
|---|---|---|
| Dust bin | Empty, wipe, wash if allowed, dry fully | Empty after every use; deep clean every 3 months |
| Foam or felt filter | Tap, rinse in cool water, dry 24 hours | Monthly tap; wash every 3 to 6 months |
| HEPA filter | Tap lightly if the manual allows; otherwise replace | Replace every 6 to 12 months |
| Brush roll | Cut hair, wipe, check bearings | Weekly check; deep clean every 3 months |
| Belt | Inspect for wear | Replace every 6 to 12 months |
| Hose and wand | Clear with a broom handle, wipe | Check monthly |
| Floor head and wheels | Wipe, brush out dust, pick out grit | Every 1 to 3 months |
| Body and attachments | Wipe with a damp cloth, rinse plastic tools | Every 1 to 3 months |
How to Remove Bad Smells From a Vacuum Cleaner
A smelly vacuum is annoying, because it spreads that stale odor around every room it cleans. Smells usually come from old dust, pet hair, damp filters or a slipping belt. These steps normally solve the problem:
- Empty and wash the bin (if washable), and dry it completely.
- Wash or replace the filters. Filters hold on to odors more than any other part, and replacing an old one often removes the smell at once.
- Remove hair from the brush roll and wipe away any grease or grime.
- Clear the hose of old debris or anything that may have rotted inside, such as food scraps.
- Wipe the body and the inside of the bag compartment or bin housing with a lightly damp cloth.
- Air everything out. Leave the parts in a well-ventilated space for a few hours before refitting.
- Replace the belt if the smell is like burning rubber.
Avoid pouring liquids, scented oils or perfumes into the vacuum or onto filters. They can clog the filter, damage the motor and may produce an unpleasant smell when the vacuum warms up. If you want a fresh scent, use a fragrance-free approach and simply keep the vacuum clean and dry.
Burning or electrical smell: If the smell comes from hot electrical parts or smoke, stop at once, unplug the vacuum and do not use it until a qualified technician has checked it.
How to Deep Clean Each Type of Vacuum
Upright Vacuums
Focus on the brush roll, belt, floor head and filters. Many uprights have several filters and a long internal airway. Check the hose and the diverter valve that sends air between the floor head and the hose, because debris often lodges there.
Canister Vacuums
Clean the canister body, filters and bin or bag housing, then check the long hose and the wand. If the power head has a brush roll, clean it like an upright. Also wipe the wheels on the canister, as they carry grit from the floor.
Cordless Stick Vacuums
Remove the battery first. Empty and clean the small bin, wash the filter if it is washable, and clean the cyclone assembly. Clear the motorized head and the wand. Wipe the battery contacts with a dry cloth, and never wash the battery or the motor.
Robot Vacuums
Remove the battery if the model allows. Empty the bin, wash or tap the filter, remove hair from the main brush and side brushes, and wipe the wheels. Clean the cliff sensors, bumper sensors and charging contacts with a dry microfiber cloth or a slightly damp one. Replace worn brushes and filters according to the manual.
Handheld Vacuums
Empty the bin, wash the filter if it is washable, clear the nozzle and brush, and wipe the housing. Because handheld bins are small, they clog fast and need deep cleaning more often.
Bagged vs Bagless Models
Bagged vacuums need a new bag during a deep clean and a wipe of the bag compartment. Bagless vacuums need a thorough clean of the bin, cyclone and any mesh screens inside. Both types need clean filters.
Wet/Dry Shop Vacuums
Empty the tank, rinse it with water, wipe the lid and hose, and clean or replace the filter (a foam sleeve for wet use, a cartridge for dry use). Let the tank and filter dry fully before storing to avoid mold.
How Often Should You Deep Clean Your Vacuum?
| Household | Suggested deep cleaning frequency |
|---|---|
| Light use, no pets | Every 6 months |
| Normal family use | Every 3 to 4 months |
| Pets or long hair | Every 1 to 2 months |
| Allergy or asthma sufferers | Every 1 to 2 months, with filters replaced on schedule |
| Dusty, sandy or construction-heavy environments | Every month, with weekly filter checks |
| Daily heavy use | Every month or so |
Troubleshooting After a Deep Clean
The Suction Is Still Weak
Check that the bin is seated properly and all seals are in place. Look again for hose blockages. Confirm the filters are installed correctly and are fully dry. If the filters are old, replace them. Check the belt and brush roll.
It Still Smells
Replace the filters, especially a HEPA filter, and check inside the hose. Make sure every part is completely dry, and look for moldy spots on the bin or in the bag compartment.
It Will Not Turn On After Reassembly
Many vacuums have safety switches that stop the motor if the bin, filter or cover is not fitted correctly. Check each piece is clicked into place. For cordless models, check the battery is seated and charged. If it still does not start, the thermal cut-off may need time to reset, or the vacuum may need professional repair.
It Makes a New Noise
A whistling noise often means an air leak or a part not fully seated. A rattle may mean a loose piece or something stuck. Switch off, unplug, and recheck all parts.
Tips to Keep Your Vacuum Cleaner Cleaner for Longer
- Empty the bin after every use, before it gets full.
- Cut hair from the brush roll weekly.
- Tap out filters monthly.
- Clean the wheels and underside so grit does not build up.
- Do not vacuum wet spills, ash, fine plaster dust or sharp objects with a regular household vacuum.
- Store the vacuum in a dry place, and do not leave a damp filter or bin in the machine.
- Replace belts, filters and bags on schedule.
- Use the correct settings for each floor type so the brush roll does not become overloaded with fibers.
Common Mistakes When Deep Cleaning a Vacuum
- Putting a filter back while it is still damp.
- Washing a filter that is not washable, especially most HEPA filters.
- Soaking the motor, battery or other electrical parts.
- Using hot water, bleach or strong chemicals that damage plastic and filters.
- Forgetting to check the belt and hose.
- Skipping the manual and removing parts that are not meant to be taken off.
- Doing the job indoors without protecting the floor and your lungs from dust.
- Using the vacuum again straight away without drying the bin and filters.
What to Look for in an Easy-to-Clean Vacuum
If your current vacuum is too worn or too hard to clean, consider these features when choosing a replacement. A machine that is easy to clean is a machine you will keep clean.
- Washable filters: save money and are quick to maintain.
- Large, easy-release bin: a no-touch release keeps dust out of the air.
- Tool-free brush roll access: lets you remove hair in seconds.
- Anti-tangle brush design: reduces hair wrap, which is a big help for pet owners.
- Clear bin or filter indicators: show you when it is time to empty or clean.
- Replaceable parts: belts, filters, brushes and batteries should be easy to find for your model.
- A sealed system with good filtration: keeps fine dust inside the machine.
- Smooth surfaces and few crevices: a simpler body is easier to wipe clean.
Frequently Asked Questions
How do I deep clean a vacuum cleaner?
Unplug it, empty and wash the bin, clean or replace the filters, remove hair from the brush roll, clear the hose and wand, wipe the floor head, wheels and body, then dry everything and reassemble. Washed parts, especially filters, should dry for at least 24 hours.
How often should I deep clean my vacuum?
Every three to six months is a good baseline for most homes. If you have pets, allergies or heavy use, aim for every one to two months.
Can I wash my vacuum filter with soap?
Many manufacturers recommend cool water only, because soap can leave residue that clogs the filter. Check your manual. If it allows soap, use a very small amount of mild dish soap and rinse thoroughly.
Can I put vacuum parts in the dishwasher?
Only if the manual clearly says so. Heat can warp plastic and filters, so hand washing in lukewarm water is the safer choice.
Why does my vacuum smell even after I emptied it?
Smells usually come from old dust trapped in filters, the hose or the brush roll, or from damp parts. Wash or replace the filters, clean the hose and brush roll, and make sure everything is fully dry.
Can I use vinegar or baking soda to clean my vacuum?
A small amount of diluted white vinegar on a cloth can help wipe a plastic bin, as long as you rinse and dry it well. However, do not pour liquids or powders into the airway or onto filters. Warm water and mild dish soap are enough for most jobs.
How do I clean a vacuum hose that is clogged?
Detach it, look through it against a bright light, and push a broom handle or long blunt tool through it. Shake it while holding it vertically to dislodge debris. Only rinse it if the manual allows, and let it dry completely.
Is it worth deep cleaning an old vacuum?
Yes, in most cases. A deep clean costs little and often restores performance. If suction is still poor after a deep clean and new filters, or if the motor is noisy or smells burnt, it may be time to repair or replace the machine.
Final Thoughts
A deep clean is one of the cheapest and most effective ways to keep your vacuum working like new. Empty and wash the bin, clean or replace the filters, free the brush roll, clear the hose, wipe down the head and body, and let everything dry before you put it back together. In about an hour of work, you can restore suction, remove odors and extend the life of your machine.
Make it a habit by setting a reminder every few months, and keep spare filters and a belt on hand. And if your vacuum is still struggling after a proper deep clean, use the buying checklist above to choose a replacement that is built to be kept clean.